From cute animals, snippets of talk show clips, comedy sketches, fitness instructional to kids saying the silliest things, YouTube is certainly a bustling agora of web. It captures the most trending niews, life’s hilarious moments and helpful tutorials.
Being the world’s second largest search engine, coming after Google and the third most visited site on the web, there are undoubtedly many reasons why you should include YouTube as part of your digital marketing strategy. Every so often, there is a YouTube video going viral. However, try as you might, virality cannot be forced.
The core of virality of any video on YouTube is user-generated content, passed contagiously amongst YouTube viewers. Daily, there are more than one billion users, who collectively watch hundreds of millions of hours of videos, generating billions of views. Users upload up to 300 hours of video every minute, meaning there is too much audio-visual noise.
That said, being found certainly requires a special talent. This is where the optimizing your content for search engines come in handy. It is a key step if you are looking for the perfect answer on how to make a video go viral. It takes quite some time, but can be made easier with various tips and tricks.
The Step By Step Video Formula
Making a video viral is much more than just creating the video itself. There are a lot of aspects to consider. This includes keyword use, title phrases, mobile compatibility and the video length. Keyword search is at the heart and bulk of this.
With this Formula, you should begin your keyword search by digging deeply into the keywords related to your intended industry and brand. Use various tools such as Rank Tracker to evaluate the keyword potential. The importance of scanning keywords cannot be ignored. YouTube, just like Google, utilizes ranking technique to determine how videos rank at the search engine results page.
To top the rankings, the number of views, length of watch time, comments and ratings play an integral role. Besides, choosing the right keywords can make the difference. Outlined below are some snippets on using the step by step Formula.
Optimize the file name
Before uploading the video on YouTube, the file will have an auto-generated video title such as LSR358.MOV. Rename the file using keywords that describe the video in similar or fewer words than the title. For instance, “A video showing how to carve a pumpkin” can be renamed to “carve pumpkin tutorial.”

When it comes to the title, pick something with a good hook and right keywords hook. Though your title may seem the only chance to execute your amazing ability to create puns, it is good to be smart with video optimization. Make a descriptive title that would work with any webpage URL. Include modifiers such as “new” or “official” to add value and draw attention.
- Example: 15 Unheard of Ways to Increase Your Vertical Jump Height (2 Minutes Per Day)
- Example: How to Cure Anxiety Instantly… With “Imaginary Box” Meditation Trick
Acknowledge your audience
The second part of the video is to acknowledge your audience. You want to relate with their pain. You should try to relate with your anticipated audience by acknowledging them in the title. If that’s something that you can do, you want to acknowledge the problem that they’re having and the reason why they’re on YouTube is they’re looking for a solution.
So you’re basically acknowledging them in some way. Even if your video brings up nothing about dealing with the pain, just acknowledge where they’re at in the process.
Example: I understand the struggle of trying to improve your jump height. Gains are slow, and painful…
Example: So look… I understand the pain of anxiety… that sporadic but intense feelings of impending doom and fear.
You should also suggest something That Might Help to your audience…
Example: But there are some faster ways to increase your jump height…
Example: And I was in the same boat… until I discovered some unique methods for clearing up anxiety attacks naturally.
Tip: If you do a 3 or 5 tip video, each tip should be 30 seconds to 1 minute of video time.
Try not to hang on the same scene for more than 15 seconds though. If you do 1 tip video only, try to pad it out to 3-5 minutes, learn how to go super in depth and pick apart the info. Make sure not to hang on the same scene for more than 15-20 seconds max. So have multiple slides if you do a 1-tip video.
Go straight to the point
So let’s say your videos about “how to cure anxiety instantly with the imaginary box meditation trick.” You should start off the video literally immediately with is very minimal lag time and as soon as the video loads you would jump right on and say here’s how to cure anxiety instantly with the imaginary box meditation trick.
The reason behind this is because people’s attention spans are kind of dropping and by the time they click your video in the sidebar and the search box, they’ve already potentially forgotten what it is that they clicked on. So, you will need to reinstate and reaffirm to them that they’re in the right place. So usually say it or show it or a combination of both.
Either display it in the top of your video with a little annotation depending on the software you use or you say it. Another key to a good video title and Intro is you want to obviously have the keywords that you’re trying to rank for.
Call to action
A call to action is the receipt for increasing your sales when it comes to YouTube marketing. It is among the best strategies on how to make a video go viral. This is a very important part of the video. This is how you Segway what you teach in the video to a better, faster, or cheaper solution.
A call to action is your transition from going from the tips to the solution that you have to offer them. Now, not every time that you make a video, it’s going to be 100 percent perfect. In your call to action, try to convince your viewers why your products are better. For instance, use words such as; here’s something that could work even better or cheaper or whatever it is that you’re selling.
A call to action should be 1 feature, 1 benefit. You can pad the benefits out a little more, but try not to take up too much video of your time with the Call to action section. The reason is because we are trying to preserve out audio-retention.
Too much of call to action will have low audience retention. People want to see your product more than they can listen to call to actions. So try to get the CTA towards the end, short, to the point.
If you are going to follow the three above-mentioned tips, each one should be about 30 seconds to one minute and try not to hang around on a slide too much. Take approximately 15 seconds per slide.
Testimonials
Testimonials significantly increase the conversion rates of your videos. If you are selling a product, I highly recommend you include some testimonials in your videos after the first call to action.
In overall, testimonials and call to actions are used when pitching a product to buy. When your call to action is a giveaway, you don’t need testimonials and call to action 2.
Example: Alright, so if this is something you think can benefit you, which I’m confident it will, go to www.mysite.com or click the link in the description below.
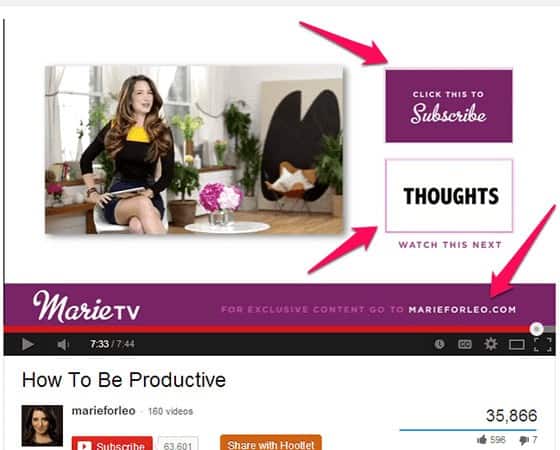
Subscribe, share, comment
At the end of the video, you should always ask the viewers to subscribe, share, and comment your video. Though this helps improve your numbers slightly, it is very important. Small improvements on YouTube make big games. You can also just a simple overlay on your final slide and simply say “Subscribe, share, and comment if you have any questions”
As part of the end Card Sequence, your video should have a final call to action with a freebie urging viewers to subscribe, and watch more videos. It reasonably warms subscribers. Just trying to build your subscriber base share gets you more traffic and it also gives your video more authority so to speak, in the eyes of Google and YouTube. It also boosts your overall rankings as well.
Try to look at this as fitting 2 puzzle pieces together. The training or information must match with the CTA offer or giveaway. Sometimes you have to “hack” the connection, because it’s not always possible to make it fit 100%.
The Open – End Tutorial Method
This is a format where a person makes the intro of the video and then goes to a tutorial based video and then reappears back on screen at the end of the video. You can use Camtasia, a paid program, or other free alternatives like iMovie and window video maker in windows.
Now in essence, every video software is the same. You basically just import video on the screen, you cut it up and pile it. They all pretty much do the same thing.
Note: this tutorial method is applicable with other software too.
For the in-person video, if you happen to mess up when recording the video, you will just need to edit out the mistake and cover it up by just resizing the video. You can then cover the cut and resized part by enlarging the video on the screen when joining with the tutorial video.
For such videos, make your intro clip just eight seconds or less. It isn’t prudent to go big with this. Some people do like 32 seconds clips, which isn’t advisable. To record open up on-screen and record the screen through your iPhone or Webcam. It is up to you what you want to use. Webcam is a little bit easier because you can just do it all at once. IPhone is a pain in the butt.
Import the clip from the from iPhone using the image capture tool(if you are on Mac). This tool works through hooking up your unlocked iPhone. It is a simple copy and paste idea. Click import which takes that file to your computer.
Moving on to the tutorial part, ensure that you don’t exceed the sweet spot for the tutorials, regardless of the niche. If it is a tech-based tutorial, five to seven minutes at most. Anything past that time limit results in a loss of audience retention.
You can usually segue into whatever the call to action is and can do an annotation pop on the screen. The call to action part of the video can have a Freebie and other ending statements such as subscribe, share it, blah, blah and add a little end card.
Putting a Voice Over In Your Scripts
Most people worry about their voices sounding bad on their YouTube videos. However, there are several ways of avoiding this, especially by getting a professional voiceover to do your voiceovers for you. Professional voiceover is a good investment for you in the following situations.
- If you just completely suck on voiceovers. Some of these professionals are really talented, thus a good option for you.
- If you don’t have a strong accent. It is beneficial to hire a professional voiceover for the scripts if you don’t speak the language fluently. With this, you can get someone to write your script for you and you just send it to a voiceover.
If you fall in either of the two categories, here is a way of getting professional voice overs. Go to Fiverr and type in voice over in the search bar. You can even filter the price range. It is best to hire male voice overs for male-oriented niche markets and female for female markets.
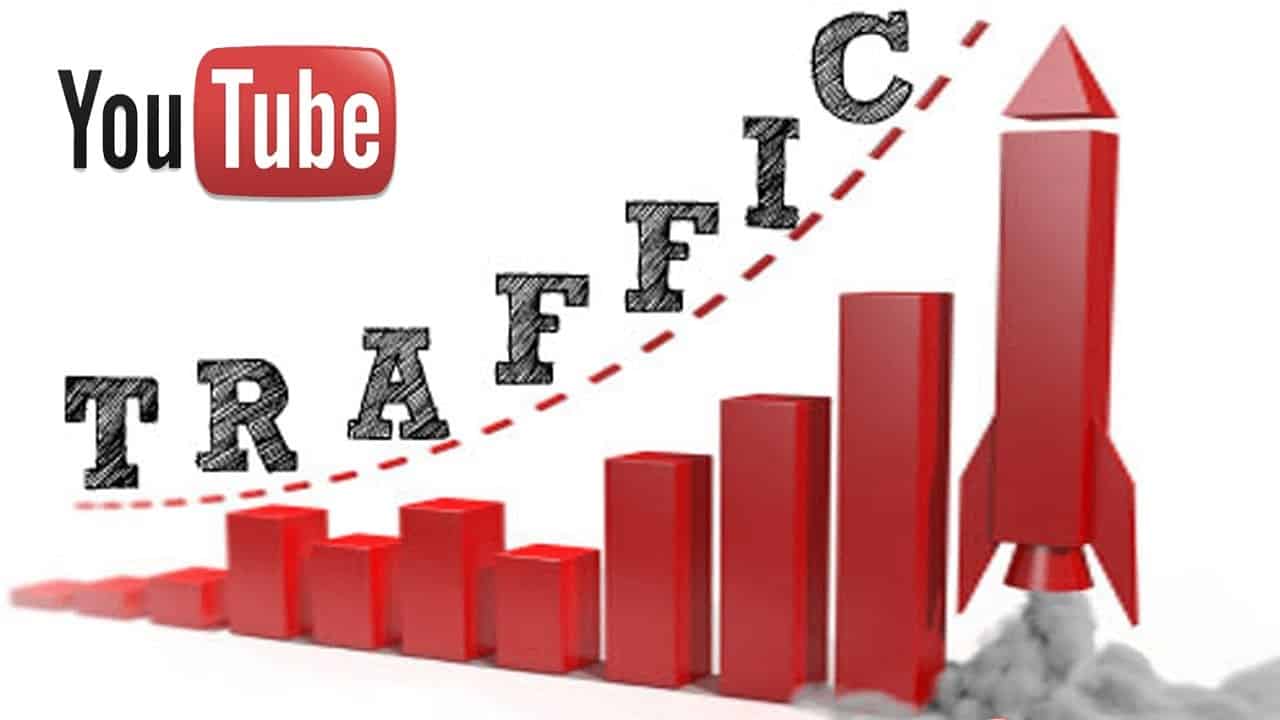
Blasting Your Videos with Traffic – Tips
Having made your video, with professional voiceovers and uploaded the video, it is time to get YouTube traffic. There are several ways of blasting your videos with traffic. Perhaps the best being enhancing its click-through rate – CTR.
Just to mention, CTR is simply the ratio of users who click on specific links versus the total number of users who view a page, advert or email. CTR measures the success of an online advertising campaign as well as the effectiveness of email campaigns. Some of the high CTR titles you can use for your video include the following.
High CTR Titles for Videos
All you need to do is replace all underlined phrases with the keywords related to your niche.
- 9 Unusual Hacks To Dramatically Increase Your Jump Height
- My Single Best Method For Getting Bigger Biceps Fast
- How I grew my channel from $0 to $100/Day Online
- 7 Things You Can Do To Get Smarter In Your Spare Time
- 3 Reasons You Should Always Invest Your Money In Index Funds
- 11 Inspiring Tips That Will Help You Solve Disputes With Co-Workers
- How to Grow Organic Tomatoes 7x Faster
- 10 Ridiculously Easy Steps to Sleep Better At Night
- 9 Lessons Learned While Changing My First Flat Tire
- 8 Deadly Moves to Seal The Deal In Any Negotiation
- Why The Underdog Usually Wins At Getting More Dates
- 10 Best-Ever Strategies For Beating Anxiety Quickly
- These Enthralling Triggers Will Make Your Dog Follow Your Commands
- Do You Truly Know How to Beat Investing Odds?
- Little Known Ways to Explode Your Max Bench Weight
- How to Build a Business With Less Than $100 Startup Capital
- 8 Creative Ways to _____________________
- How I [Case Study]. Example: How I Lost 11 Pounds of Body Fat In 2 Weeks.
- 18 Ways to Supercharge Your Book Reading Speed
- Why Stealing Other People’s Ideas Triumphs Coming Up With Your Own.
- The Complete Guide To Working Out At Your Office Cubical
- Confessions Of a 7 Figure Affiliate Marketer
- 3 Actionable Ways to Grow Your Social Media Following in 2018
- A Noob Guide to Turning Advertising Profits Into Long Term Income
- 6 Common Mental Errors That Cause Startup Businesses To Fail
- 4 Golf Swing Goofs That Slash 50+ Yards From Your Drive Distance.
- SHOCKING VIDEO: Why You Are Losing 22% In Credit Card Interest
- 11 Sneaky Ways to Win Any Argument And Get Your Way
- 7 Uncommon Ways to Dominate Google SERPs From Day 1
- These Stupid Mistakes Can Cost You Millions in Online Income
- Stinky Feet? Here’s How to Fix it.
- How to Fight Like a Pro
- Savvy Ways to Save Money on Your Next Internet Bill
- The No-Nonsense Guide to Stopping Excessive Sweating now
- How to Easily Win Negotiations… Like a Boss!
- 10 Christmas Gift Ideas For Guitar Players
- 3 Things That Michael Phelps Does To Swim Faster
- Be careful about using unlicensed images of celebrities. You can mention their names in your videos though!
- 10 Rookie Mistakes That Kill Your Brain Power
- The Essential Guide To Outdoor Camping
YouTube SEO

YouTube seo is as important as posting your videos on YouTube. Below are some of the tips to YouTube SEO.
- Customize your channel watermark. This can help you get more subscribers.
- Go to creator studio.
- Click channel
- Click brandingr
- Click add a watermark.
- Upload you watermark and save
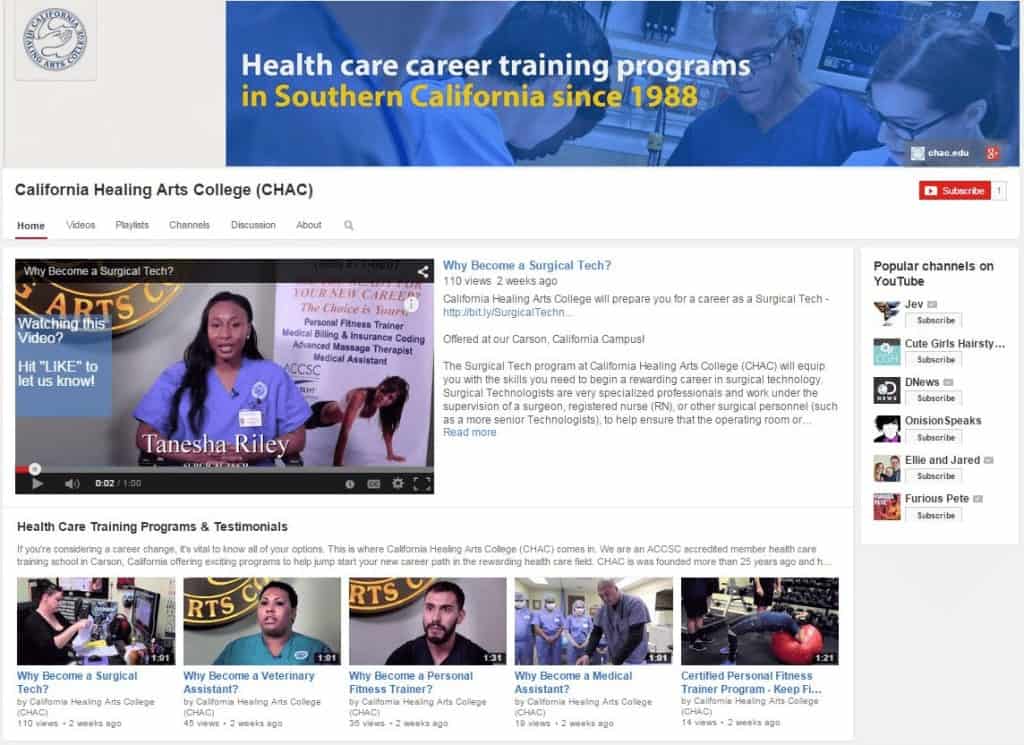
- Change your channel picture. Make sure its related to what it is that you want to talk about.
- Go to pixabay to search an image.
- Click channel icon and upload photo. Click Done
- Add a little description to your channel.
- Go to about.
- Customize Channel.
- Click Channel Description. (Include the keywords that you want to rank for in creating your description.)
- Click Done and Save.
- Add keywords
- Creator Studio
- Channel
- Advanced
- Channel Keywords and save
Each time you post a video, make sure to follow this formula, regardless of your niche.
- Publish a video – Short description, video file name, title, tags
- Immediately social bookmark.
- Immediately promote to Facebook groups, Google+, email lists, Facebook page, Pinterest boards, Quora, Google maps, twitter, etc.
- 24 Hours Later. Syndicate to Top Video Sites.
- 24-72 Hours Later: PBN promotions (WordPress, Blogger, Weebly)
- Weeks Later – Publish a 500+ Word Article into Video Description
Thumbnails and Title
Without good titles and thumbnails, you might as well forget about getting traffic because your videos won’t go viral. Make sure to get this right before anything else.
- Check Titles Sample Above
- Video file name
- Make sure to include your keyword in your actual video file name
Top Web 2.0 Props for SEO
Some of the top Web 2.0 that can be used for SEO include;
- WordPress, Blogger, Tumblr, Your Own Blog – These are the big 4
- Hidden Gem: SItes.Google.com
- Weebly, Wix, Over-Blog, EverNote
Thank you page
Besides creating high CTR titles, YouTube SEO, and selecting the best thumbnails and title, consider introducing a thank you page. This is the best way to get subscribers and make money online, regardless of what niche you’re in. A thank you page should contain the following:
- Quick Video
- Send to Messenger or Facebook Log Messenger (Optional)
- Personal brand
- Download Freebie (EBook)
- Video Series (5 Videos) – 1 Tip for Each Video and this can be 3-5 minutes each ( You can unlist these videos so people won’t find it on a regular YouTube channel search)
- At the end of the video, that’s where you will recommend your product.
Thank You Page Set-Up
There are several benefits of setting up a thank you page. But, how do you go about this? Check out the setup procedure below.
STEP 1: Subscribe to Me on YouTube
STEP 2: Like our Facebook Page
Whether you pick your Facebook page or Facebook group or connect with you on Facebook live on messenger, it is solely up to you. Either is a good option. However, Facebook page is a little bit easier when you are starting out. Eventually, once you start building your audience, you might consider shifting to either Facebook groups or live messenger.

You can consider using windows movie maker when setting up your thank you page. It should not be more than a minute. Upload it on YouTube and keep it unlisted and copy the URL. Once you already copied that URL, go to “Get Response page builder,” embed the video and add the download for the actual eBook.
Whatever your name is, you need to reinstate that on your video just to present your name into your viewers one more time so that when you email them in the future, they will know who you are.
Testimonials
As mentioned from the step by step Formula, testimonials comes in handy as a major tip on how to make a video go viral. If you want to build a personal brand, anything big and long-term audience or something that you are really passionate about and proud of, you should place your face on it. The more effort you put in creating your thank you page, the better. Testimonials need to be real. Don’t pay people for it. It should be from real customers.
Autoresponder Sequence – Get Response App
The reason why you need to resend the link is because some people may experience their browsers getting crashed. Many times, they will just watch a minute or two and may opt to come back later. It is important right from Day 1, to set this up as day 0. They opt in at this moment.
Include on the email the link that you promise (the freebie), what they will learn. This is just to remind them what they subscribe for and what that freebie is.
The next thing to do is to include testimonials. The more testimonials you have the better. If you have an affiliate offer that you’re promoting just contact the vendor and ask them if you can use that testimonial on your page or on your email.
You can also add another PPS with the link to your Opt into your Facebook live messenger lists. Also, “Subscribe/follow me” on button for your social media profiles including;
- YouTube
- Google+
You can send mail twice per day in the day as the open rate during day 0 is pretty high. First Email on Day 1 – 24 Hours After the Subscriber, the Customers’ Opt in.
If the last video on your thank you page stop at Part 5, at the end of that video you can say something like “just keep an eye out for the follow-up email which has a link for part 6 of the process.
A quick little summary of what should be in the video include;
- Brief introduction
- Topic of the video
- Problem and benefits
- Link – You can place the link of your video at the image as it gives the ability to brand yourself and gets more clicks. They can associate your face a lot easier when you’re using an image as a link. This will be your selling video.
- Continuation of the benefits
- Repost your link
- P.S Section – You can place here the testimonial with the link of your product below it. This is where you can start selling or promoting your product
- Add another P.P.S – Your Facebook live messenger
- Subscribe/Follow Me – YouTube, Facebook, Google+, Twitter, My Blog
- Subscribe to Facebook live messenger button
However, when you’re starting out, it is recommended to avoid selling videos throughout, just send them back to your free content videos. These types of videos from Day 1 should be in repeat until the end or Day 50. You will notice that majority of the buying occurs during the first 14 days. Find testimonials if possible video testimonials that you can use, whatever your niche is.